new
Elvanto
Introducing the Group Finder
Today we're excited to announce a new feature, the Group Finder!
The Group Finder is a Member area facing tool, which allows members and guests to view a list of groups that they can request to join, and have the group leaders accept/decline the requests as they come in.
Enabling in your account
This feature can be enabled in your account under Settings -> Groups -> Group Finder.

Once enabled you'll have more options to restrict which groups can appear, and what criteria users can filter groups based off.
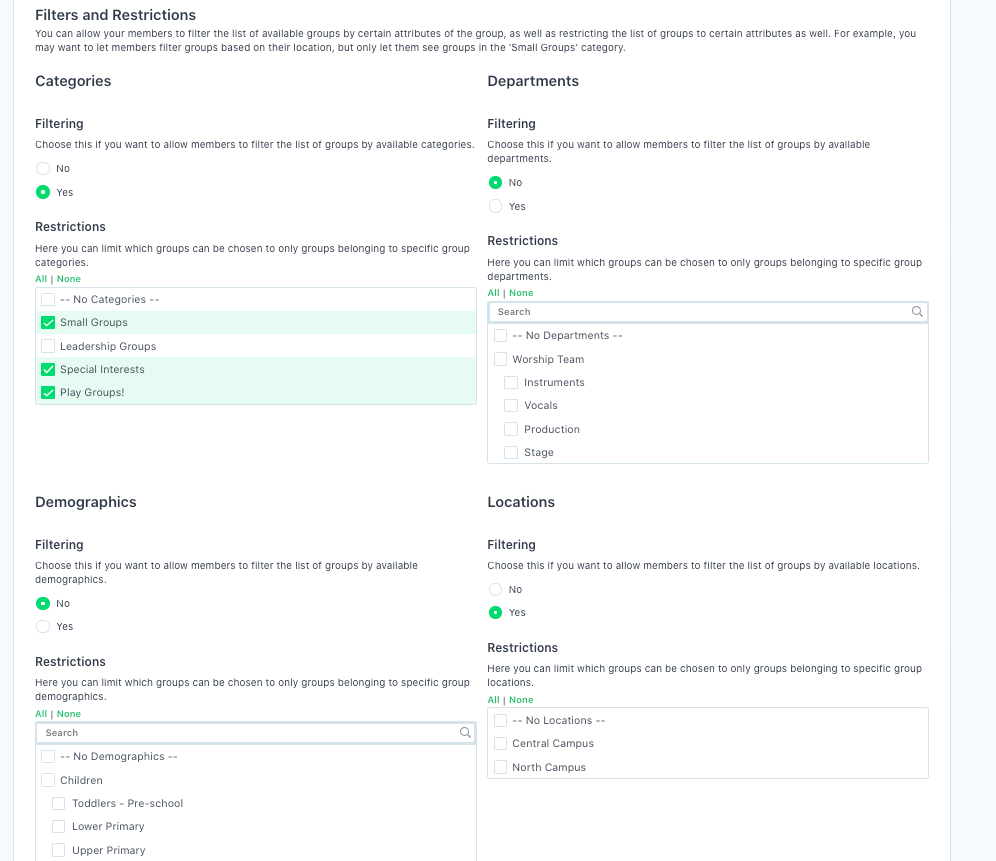
You'll see that for each of the follow attributes, you can choose to allow users to filter groups based on that attribute, or restrict which groups appear based on that attribute.
- Group Categories
- Locations
- Departments
- Demographics
If you do not choose any options for the "Restrictions" then we won't restrict based on that attribute at all.
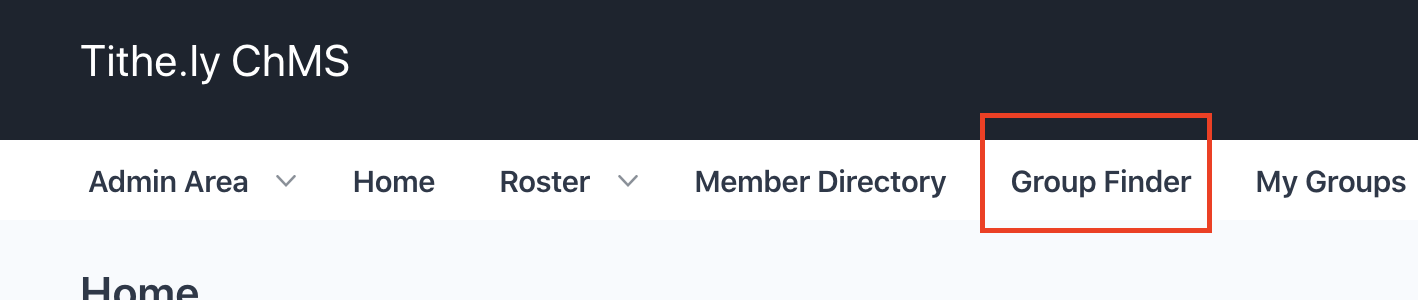
For existing accounts who are enabling this, it would be best to add “Group Finder” to their navigation menu under Settings -> Layouts, as discussed further in this article. New accounts won’t need to do this, but existing churches who’ve customized their menu in the past will need to. This allows people to actually find the page in the Member area.
Setting up individual groups
Once you've setup the finder for the account, individual groups now need to have applications opened for them.
Once the Group Finder has been enabled, each individual group will have an option for “Group Finder Status” in the edit page.

By default groups will be closed, but admins can open up the groups as needed. That’s all that’s needed within the group itself.
Joining a Group
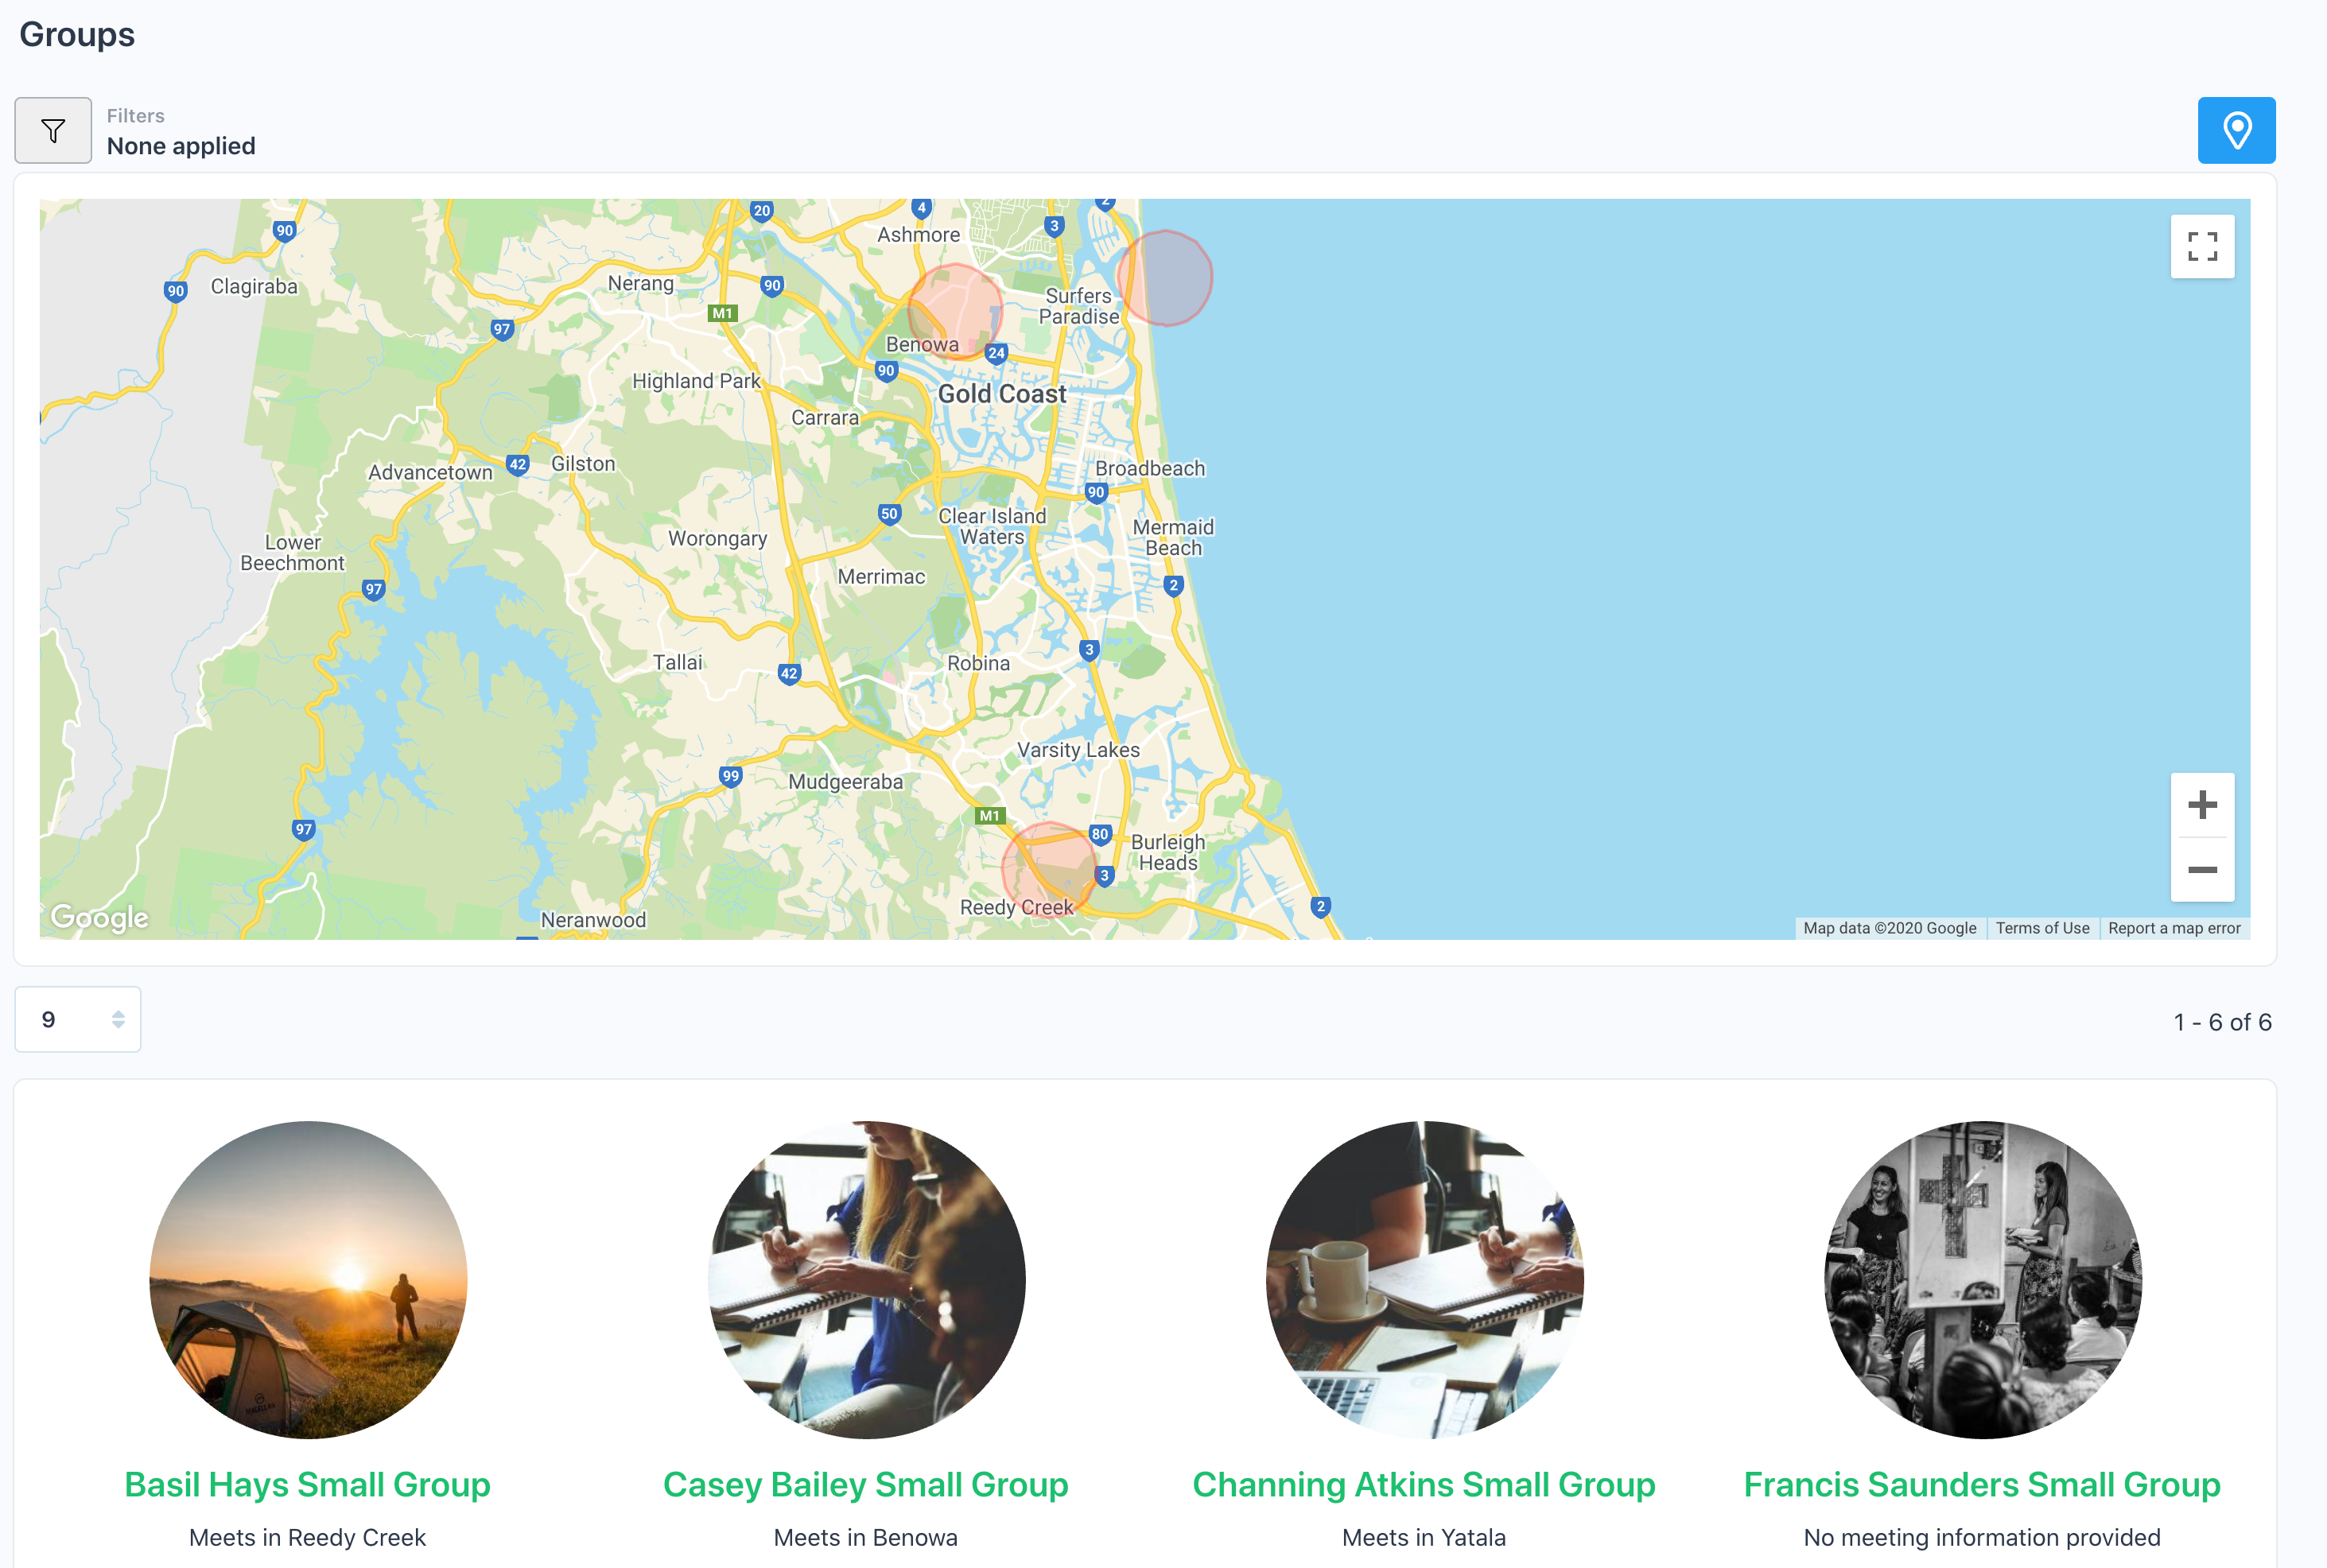
From within the Member Area, assuming the admins have added the “Group Finder” link to the member area, the members simply need to visit the Group Finder from the Menu.
This will load a page with a map showing where the groups are, and a list of groups.
Individual users can choose to hide the map by clicking the blue icon on the top right if desired and just look at the list of groups. Or they can use the map to find a group near them. If they wish to filter the list of groups, they can click the filter icon on the top left and filter based on the choices available to them according to the account settings.
Once the user has found a group they like, they can click on it’s name to load more details about that specific group.
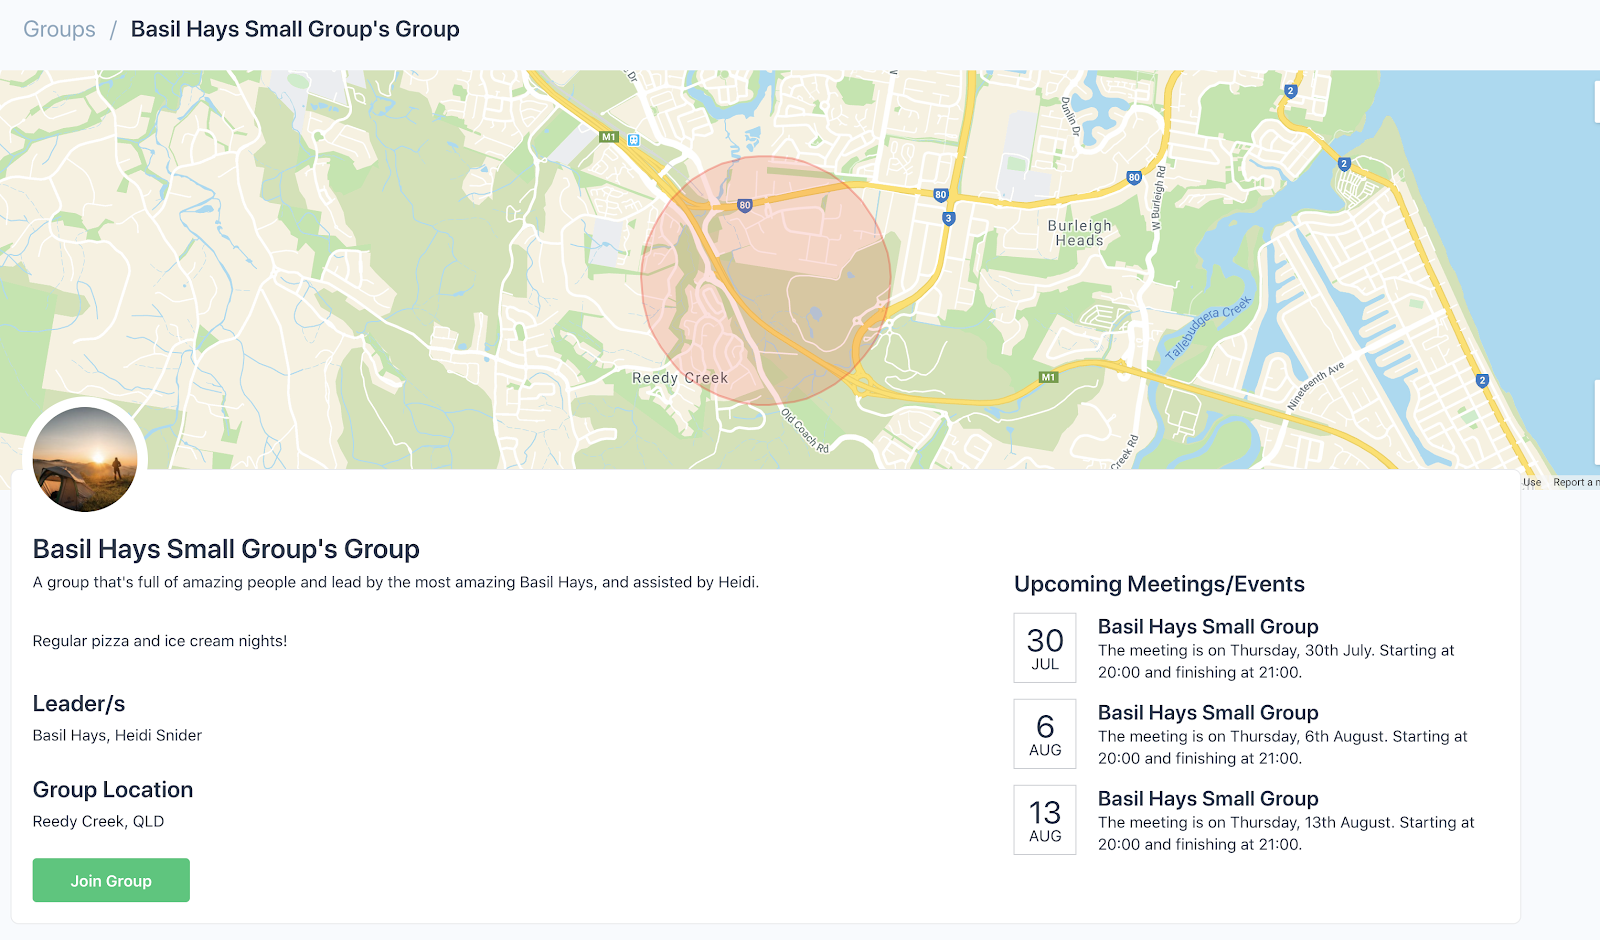
If the user wants to join the group, they simply click on the “Join Group” button. This will let them fill in a form to collect their information as needed.
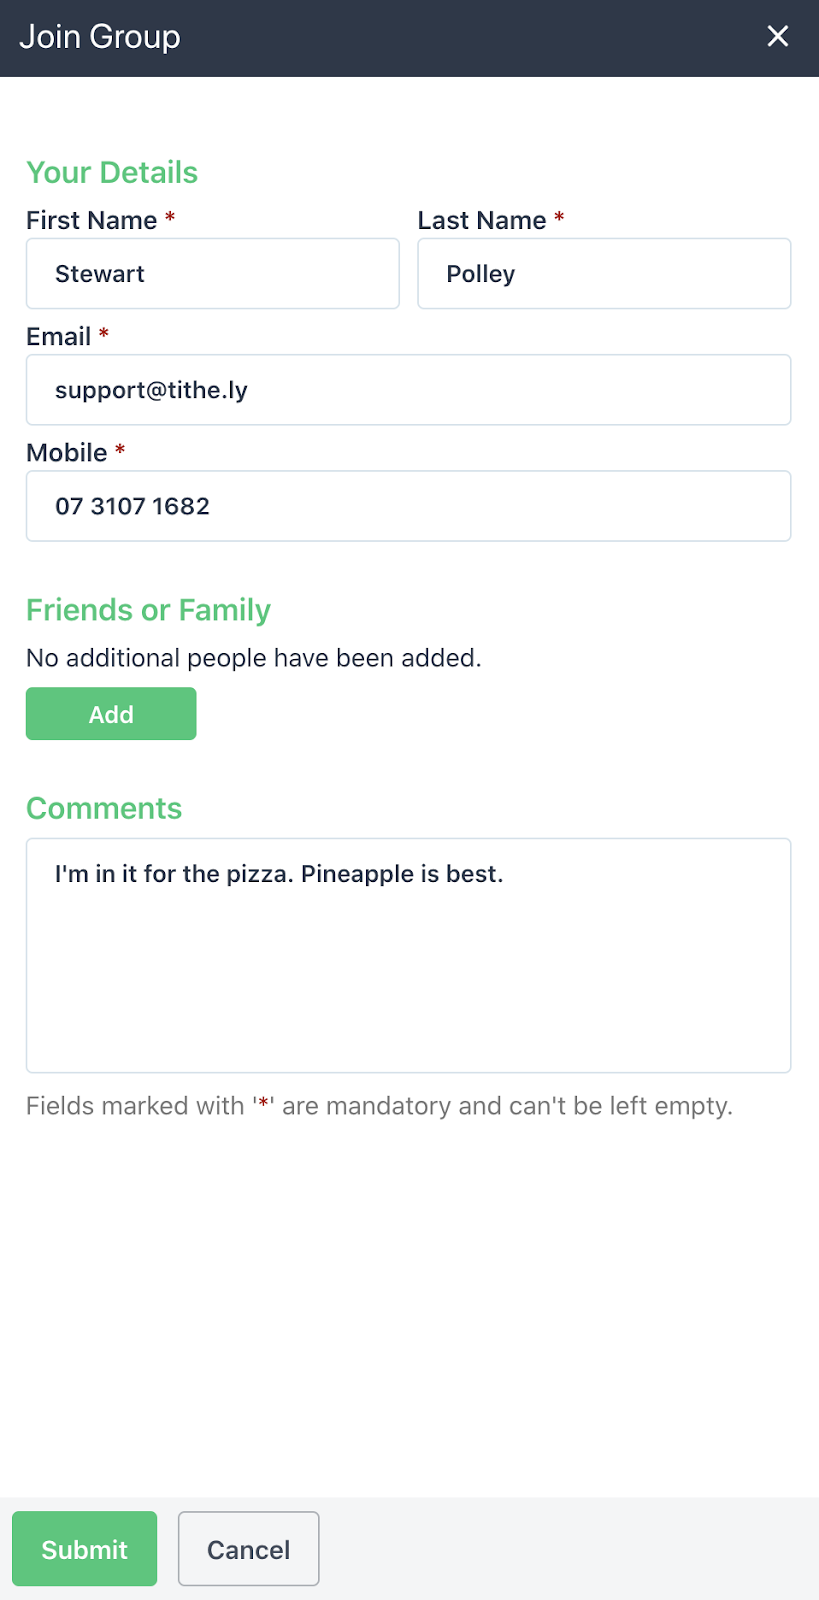
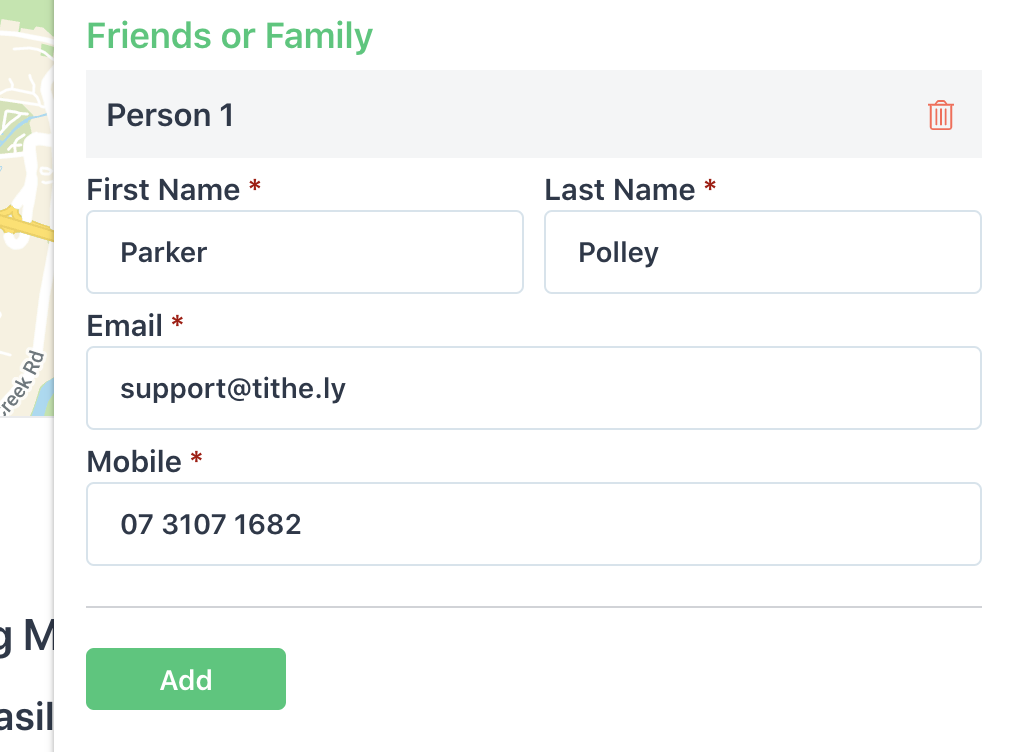
This form then allows the user to enter their information so that we can make sure to contact them about the application and the group leader can contact them. You can also use the “Friends or Family” button to add in details about other members to join the group with you.
Viewing Applications
Group Leaders will receive email notifications of any newly submitted applications, as well as notifications within the system.

When you click on the “View All Pending Group Requests” link you’ll come to a list of all requests that contains the information about them.
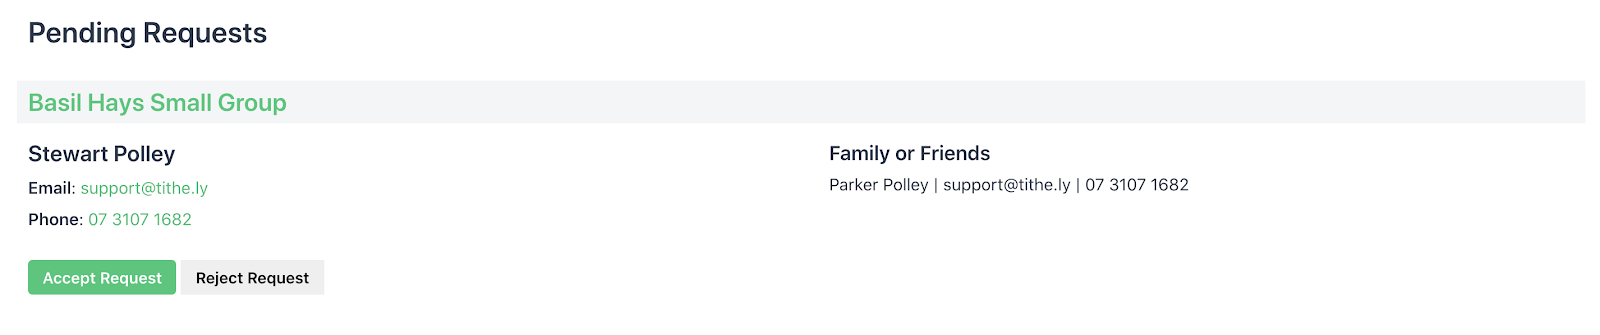
The group leader can then accept or reject each request as needed.
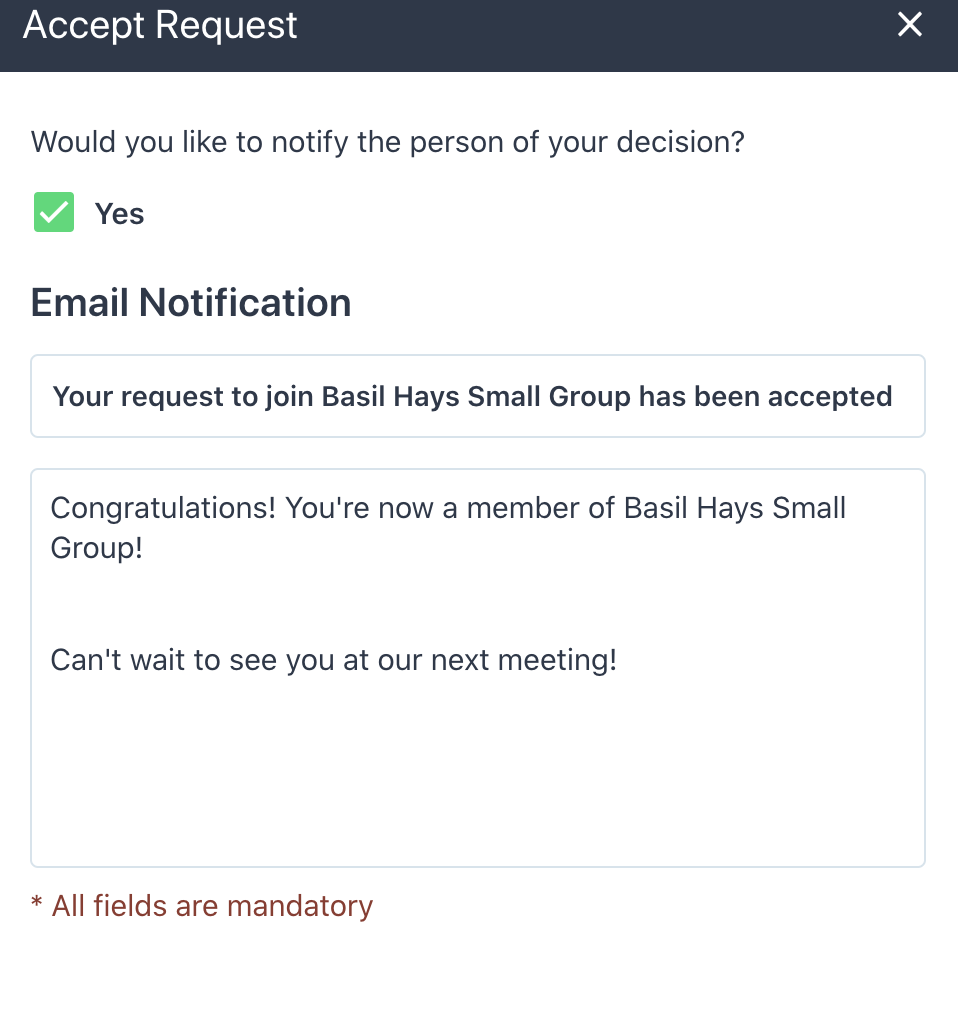
When accepting the request or rejecting the request, you can choose to notify the person who made the request about the decision.